OS : Window 11
Version : 2021.3.6f1
오늘은 URL이미지를 가져오는 방법에 대해 알아보겠습니다.
먼저 이쁘장한 이미지를 하나 찾습니다.
저는 아래의 이미지를 사용하겠습니다. (링크는 이미지 캡션에 있습니다.)

간단하게 캔버스에 이미지를 하나올려서 확인해 봅시다.
주의 할점은 URL로 불러오실 때, RawImage로 캔버스에 생성하셔야 합니다.
그리고 RawImage에 LoadURLImage라는 스크립트를 추가합니다.

그런 다음 아래에 있는 GetTexture를 작성합니다.
간단하죠?
근데 URL를 계속 스크립트에서 쓰면 조금 힘드니 인스펙터창에서 사용할 수 있도록 합시다.
추가로!! 이미지가 잘 들어왔는지 확인해야죠? 이 부분도 수정해 줍시다.
using System.Collections;
using System.Collections.Generic;
using UnityEngine;
using UnityEngine.Networking;

public class LoadURLImage : MonoBehaviour
{
    // Start is called before the first frame update
    void Start()
    {

    }

    // Update is called once per frame
    void Update()
    {

    }
    IEnumerator GetTexture(string url)
    {

        UnityWebRequest www = UnityWebRequestTexture.GetTexture(url);
        yield return www.SendWebRequest();
        if (www.result != UnityWebRequest.Result.Success)
        {
            Debug.Log(www.error);
        }
        else
        {
            Texture myTexture = ((DownloadHandlerTexture)www.downloadHandler).texture;
        }
    }
}
다음과 같이 수정해 줍니다.
public을 사용하면 인스펙터창에 나타나고 다른 클래스에서도 호출할 수 있게됩니다.
그리고 저는 현재 RawImage에 스크립트를 작성했기 때문에 GetComponent만 사용하면 됩니다.
using System.Collections;
using System.Collections.Generic;
using UnityEngine;
using UnityEngine.UI;
using UnityEngine.Networking;

public class LoadURLImage : MonoBehaviour
{
    public string url = "https://i.pinimg.com/564x/c6/3e/ff/c63effc78080418c1a4773e31d6fd1c5.jpg";
    RawImage rawImage;
    // Start is called before the first frame update
    void Start()
    {
        StartCoroutine(GetTexture(url));
        rawImage = GetComponent<RawImage>();
    }


    // Update is called once per frame
    void Update()
    {

    }
    IEnumerator GetTexture(string url)
    {

        UnityWebRequest www = UnityWebRequestTexture.GetTexture(url);
        yield return www.SendWebRequest();
        if (www.result != UnityWebRequest.Result.Success)
        {
            Debug.Log(www.error);
        }
        else
        {
            Texture myTexture = ((DownloadHandlerTexture)www.downloadHandler).texture;
            rawImage.texture = myTexture;
        }
    }
}
이렇게 나타나는걸 확인 하실 수 있죠

근데 이거 나 저장도 하고 싶은데...라고 한다면!!
아래의 소스코드를 추가해줍니다.
    public void SaveOriginImage(Texture texture, string directoryPath, string fileName)
    {
        if (true == string.IsNullOrEmpty(directoryPath))
        {
            return;
        }

        if (false == Directory.Exists(directoryPath))
        {
            Debug.Log("디렉토리가 존재하지 않음 -> 생성");

            Directory.CreateDirectory(directoryPath);
        }


        //Texture를 Texture2D로 변환
        int width = texture.width;
        int height = texture.height;

        RenderTexture currentRenderTexture = RenderTexture.active;
        RenderTexture copiedRenderTexture = new RenderTexture(width, height, 0);

        Graphics.Blit(texture, copiedRenderTexture);

        RenderTexture.active = copiedRenderTexture;


        Texture2D texture2D = new Texture2D(width, height, TextureFormat.RGB24, false);

        texture2D.ReadPixels(new UnityEngine.Rect(0, 0, width, height), 0, 0);
        texture2D.Apply();

        RenderTexture.active = currentRenderTexture;


        byte[] texturePNGBytes = texture2D.EncodeToPNG();

        string filePath = directoryPath + fileName + ".png";
        File.WriteAllBytes(filePath, texturePNGBytes);

    }
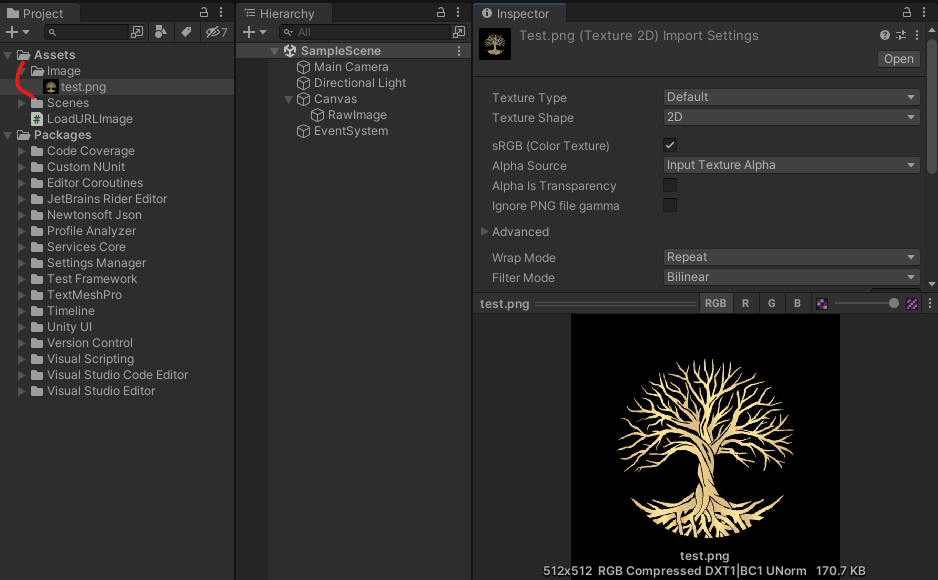
그리고 매개변수 값을 넣어주고 실행하면 다음과 같이 경로가 생성되고 이미지도 저장됩니다.

아니 근데 정말 RawImage밖에 안되나???
난 스프라이트로 하고 싶어!! 라고 한다면 아래의 방법으로 하시면 됩니다.
RawImage를 Image로 바꿔주었고 Sprite.Create를 이용하시면 됩니다.
using System.Collections;
using System.Collections.Generic;
using UnityEngine;
using UnityEngine.UI;
using UnityEngine.Networking;
using System.IO;

public class LoadURLImage : MonoBehaviour
{
    public string url = "https://i.pinimg.com/564x/c6/3e/ff/c63effc78080418c1a4773e31d6fd1c5.jpg";
    Image image;
    // Start is called before the first frame update
    void Start()
    {
        StartCoroutine(GetTexture(url));
        image = GetComponent<Image>();
    }


    // Update is called once per frame
    void Update()
    {

    }
    IEnumerator GetTexture(string url)
    {

        UnityWebRequest www = UnityWebRequestTexture.GetTexture(url);
        yield return www.SendWebRequest();
        if (www.result != UnityWebRequest.Result.Success)
        {
            Debug.Log(www.error);
        }
        else
        {
            Texture myTexture = ((DownloadHandlerTexture)www.downloadHandler).texture;

            image.sprite = Sprite.Create((Texture2D)myTexture, new Rect(0,0,myTexture.width,myTexture.height),new Vector2(0.5f,0.5f));
            SaveOriginImage(myTexture, Application.dataPath + "/Image/", "test.png");
        }
    }

    public void SaveOriginImage(Texture texture, string directoryPath, string fileName)
    {
        if (true == string.IsNullOrEmpty(directoryPath))
        {
            return;
        }

        if (false == Directory.Exists(directoryPath))
        {
            //이 부분에서 디렉토리를 생성하거나 리턴
            Debug.Log("디렉토리가 존재하지 않음 -> 생성");

            Directory.CreateDirectory(directoryPath);
        }


        //Texture를 Texture2D로 변환
        int width = texture.width;
        int height = texture.height;

        RenderTexture currentRenderTexture = RenderTexture.active;
        RenderTexture copiedRenderTexture = new RenderTexture(width, height, 0);

        Graphics.Blit(texture, copiedRenderTexture);

        RenderTexture.active = copiedRenderTexture;


        Texture2D texture2D = new Texture2D(width, height, TextureFormat.RGB24, false);

        texture2D.ReadPixels(new UnityEngine.Rect(0, 0, width, height), 0, 0);
        texture2D.Apply();

        RenderTexture.active = currentRenderTexture;


        byte[] texturePNGBytes = texture2D.EncodeToPNG();

        string filePath = directoryPath + fileName + ".png";
        File.WriteAllBytes(filePath, texturePNGBytes);

    }
}
'유니티' 카테고리의 다른 글
| C#을 사용하여 Unity 폴더의 파일 목록 가져오기 (0) | 2023.03.11 |
|---|---|
| 유니티에서 http 로컬 서버의 file목록 가져오기 (0) | 2023.03.09 |
| ChatGPT 가라사대, 유니티 게임 엔진으로 게임 제작하기 (0) | 2023.03.03 |
| PCG 기술을 사용한 유니티 RPG 게임 개발 - 1장 도전 문제? (0) | 2022.05.18 |
| Unity Mesh Renderer Size (0) | 2022.05.16 |